Applique embroidery digitizing isn’t just about turning pretty pictures into thread. It’s an art form. If you’ve ever stared in awe at those layered, textured embroidered pieces and wondered how they get it so precise—well, that’s the magic of good digitizing. But here’s the kicker: the real pros have tricks they don’t always share. Until now.
Let’s dive into this step-by-step journey that unveils the 7 secrets to mastering applique embroidery digitizing.
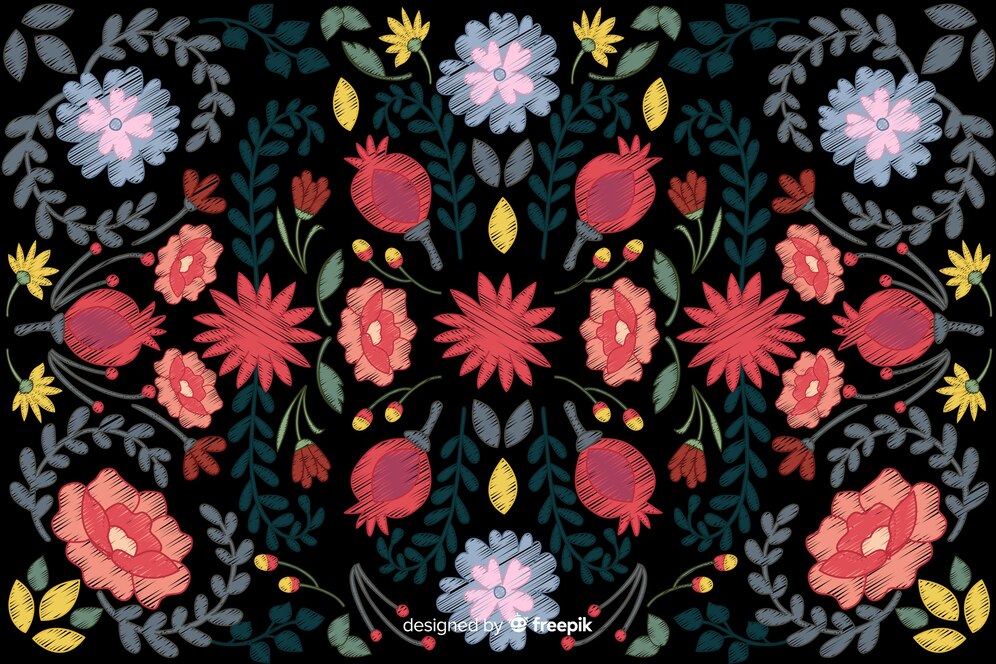
Applique is all about stitching fabric shapes onto a base fabric. Think of it like crafting with cloth and thread. It’s creative, colorful, and full of possibilities.
Digitizing is the process of converting artwork into a file that an embroidery machine understands. In the case of applique, it’s more than just outlining shapes. You’re programming every stitch, every corner, every overlap.
Unlike standard embroidery, applique uses pieces of fabric as fill. So, your digitizing has to include placement lines, tack-down stitches, and finish stitches—all perfectly timed.
Why fill large areas with stitches when fabric does the job better? Applique reduces stitch count, saving thread and machine time.
A detailed dragon, a floral bouquet—applique simplifies designs that would otherwise take hours to embroider.
Applique opens the door to texture, color variety, and layering effects that plain stitching just can’t match.
Pick a fabric that complements the base material. Too thick and your stitches may skip. Too light and it might pucker.
Make sure your applique fabric works well with the stabilizer beneath the base fabric. This affects everything from alignment to stitch tension.
Great for clean, bold edges. It wraps around the applique nicely.
Zigzag gives a more casual finish. Running stitch is subtle—perfect for raw edge applique.
Match your stitch to the look you want. Want polished and formal? Go satin. Want crafty and soft? Try zigzag or raw edge.
Too dense and it looks bulky. Not dense enough and the edges fray. Test different densities for each fabric combo.
Don’t expect delicate cotton to behave like denim. Adjust stitch settings based on fabric response.
Layer different applique pieces for a 3D look. Think of it like building a puzzle.
Always digitize from bottom up. This helps with alignment and avoids uneven bulges.
Pre-cutting with templates saves time but needs accurate placement. Cut-in-the-hoop takes longer but is super precise.
If you’re producing in bulk or need absolute perfection, laser-cutting your applique fabric can be a game changer.
A blurry or pixelated JPG won’t convert well. Start with crisp images with clear lines and contrast.
Not all software handles JPG to PES equally. Wilcom, Hatch, and Embrilliance are popular picks. They interpret shapes better and offer advanced editing features.
Always run a sample before final production. It catches errors early.
Some fabrics stretch. Some shrink. Your test helps fine-tune density, stitch length, and underlay.
Big mistake. Stabilizers are your best friend in avoiding puckering and misalignment.
Double-check your digitized placement lines. If they’re off, the whole applique looks sloppy.
Use sharp applique scissors or snips. Frayed or uneven cuts ruin the clean edge of your design.
Invest in quality software that simplifies applique tools—look for built-in tack-down and placement stitch options.
Precision scissors, the right-sized hoop, and good stabilizers make all the difference.
Look for software with good auto-digitizing features that still allow for manual tweaks. That’s the sweet spot.
Applique adds a handcrafted feel to branded merchandise. It’s perfect for patches, uniforms, and more.
Use pre-cut kits or laser cut pieces to maintain consistency across high-volume orders.
Adding padding or using thick fabrics gives depth. It’s trending big in fashion embroidery.
Combining applique with sequins, beads, or even print fabrics creates stunning, one-of-a-kind results.
Scale designs in software, not just the machine. That way, stitch density adjusts properly.
Use medium to heavy stabilizers for large applique areas. Float a topper if your fabric is stretchy or fluffy.
Mastering applique embroidery digitizing is like learning a secret language. Once you understand the flow—placement, tack-down, finish—you unlock a whole new level of creativity. Whether you’re a hobbyist or running a full-blown embroidery business, these 7 secrets will elevate your applique from basic to breathtaking.
Wilcom, Hatch, and Embrilliance are industry favorites. They offer powerful features for precise applique digitizing.
Not all images work well. Clear, high-resolution images with distinct lines convert best to PES format.
Simple designs may take 15 to 30 minutes. Complex, multi-layered ones can take hours, especially when fine-tuning is involved.
Absolutely. With the right software and practice, beginners can achieve professional-looking results.
Use proper stabilizers, test your stitch settings, and avoid overstretching the fabric during hooping.
| Categories: | Services / Digital Marketing Services |
| Phone: | +18338788344 |
| Address: | Chicago, Illinois USA, 60601 United States |
| Website: | View our site |
| Email: | order@truedigitizing.com |